We’re almost there! This is the final blog post in the CKAD series! I hope you got value out of the learning experience.
Let’s dive into our final topic (as there is only one):
Understand PersistentVolumeClaims for storage
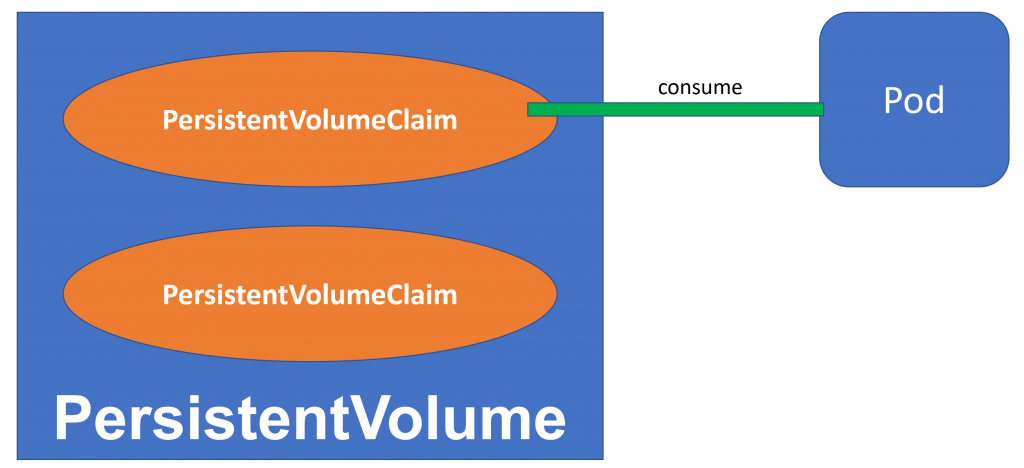
Our final topic for the CKAD requires us to understand PersistentVolumeClaims. We worked with Volumes before in a couple of examples, and PersistentVolumes (and claims) help us with providing a process to map 1 storage class to multiple pods.
It is a bit confusing to understand the difference between a PersistentVolume and a PersistentVolumeClaim. Think about it like a node and pods: a PersistentVolume is like a node, a PersistentVolumeClaim is like a pod running on a node. Making this ‘real’: the PersistentVolume is a provisioned piece of storage, whie the PersistentVolumeClaims consume parts of that PersistentVolume. Pods can consume (I didn’t want to call it mount) these claims to read/write data from/to.

So, let’s build out a sample:
- We’ll reserve a 10GB block of file system space on /
mnt. (this works only on a single-node cluster!) - We’ll create a PersistentVolumeClaim there of 2GB
- We’ll mount that PersistentVolumeclaim to a pod.
Step 1 will be to create our PersistentVolume. This would look something like this:
apiVersion: v1
kind: PersistentVolume
metadata:
  name: volume
spec:
  storageClassName: hyperstorage
  capacity:
    storage: 10Gi
  accessModes:
    - ReadWriteOnce
  hostPath:
    path: /mnt
Adding to this, we can create our PersistentVolumeClaim:
apiVersion: v1
kind: PersistentVolumeClaim
metadata:
  name: pvc
spec:
  storageClassName: hyperstorage
  accessModes:
    - ReadWriteOnce
  resources:
    requests:
      storage: 2Gi
This will create our PersistentVolumeClaim. Now that we have this, we can mount this in a pod:
apiVersion: v1
kind: Pod
metadata:
  name: pod
spec:
  volumes:
    - name: local-volume
      persistentVolumeClaim:
        claimName: pvc
  containers:
    - name: nginx
      image: nginx
      volumeMounts:
        - mountPath: "/tmp/pvc"
          name: local-volume
As you can see in the pod definition, we define the link between the persistentVolumeClaim and the local volume that will be mounted at that volume level. The name of the claim is important.
Once we have this, we can actually go ahead and look into our mounted directory:
kubectl exec -it pod sh
ls /tmp/pvc
If you’re running this on the Azure Kubernetes Service, you’ll see a DATALOSS_WARNING_README.txt file. This is because the /mnt path of the host is the temporary drive on the host VM. But that way you also see that the files on the host system are shared with the actual pods.
Conclusion
That’s it! In this final topic of the CKAD study process, we discussed PersistentVolumeClaims and how to mount them in your pod.
With all these study materials in your back pocket, you should now be able to go ahead and take your CKAD exam!