Azure Policy is a powerful tool in your Azure toolbox. It allows you to enforce specific governance principals you want to see implemented in your environment. Some key examples of what Azure Policy allows you to do is:
- Automatically tag resources,
- Enforce specific regions,
- Enforce VM size …
I recently ran into a customer scenario, where they wanted to block VMs from having a public IP. If at possible, this should only apply to a select subset of VNETs – not to all VNETs.
I’ll walk you through on how this can be implemented, but why don’t we start with an introduction on Azure Policy?
Azure Policy Introduction
Azure Policy is a (free) Azure service that allows you to enforce your governance rules on your subscriptions. The service itself has grown over the years that I’ve worked with it. Back in the day, all policies needed to be implemented through PowerShell or CLI. This day, Policy is a full service, that comes with a bunch of pre-built policies and a schedule that regularly scans your environment.
When talking about policies, there are two important terms you need to understand: definitions and assignments. A policy definition is a description of what you want your policy to be; a policy assignment implements a certain policy at a certain scope.
A policy definition itself looks very similar to an ARM template. In the example we’ll work through, we’ll actually see that code. An ARM template can have parameters set, and a policy can have well. This means the same policy definition could be assigned multiple times, but with different parameters.
In the policy definition, you define a certain logical operator (e.g. if this VM is deployed in West US2), and you define an action. These actions can be:
- Append – append part of of the ARM template.
- Audit – create an audit event in the Azure activity log
- AuditIfNotExists – creates an audit event in the Azure activity log if the resource doesn’t have the details mentioned in the ‘then’ clause
- Deny – deny the request
- DeployIfNotExists – can be used to deploy additional resources, e.g. a custom script extension
- Disabled – Can be used for testing, this makes it possible to disable a single assignment, not all assignments
- Modify – used to modify tag information
- EnforceRegoPolicy – (in preview) is used with AKS.
A Policy assignment links a definition with a certain scope. That scope could be a management group, a subscription or a resource group. Policies can overlap, e.g. you can have policies on both a subscription and a resource group.
One final point on Policy is how it differs from role based access control (RBAC), as from a high level both share some similarities. Where Azure RBAC gives people access to a certain scope and gives them rights to make changes to that scope (create/read/update/delete resources); Azure Policy limits some of these actions for a person with rights. I like to think of Azure RBAC as giving the ability to call a certain API on a certain scope, and Azure Policy as the bouncer on that API, making sure only those calls come through that you want to come through.
And with that, let’s start building our example:
Block public IPs for everything in our subscription
There is a built-in policy in the Azure Policy service that allows you to block public IPs on all NICs. Let us start with this policy, and then work on updating this policy to work with our ‘only certain VNETs’ example.
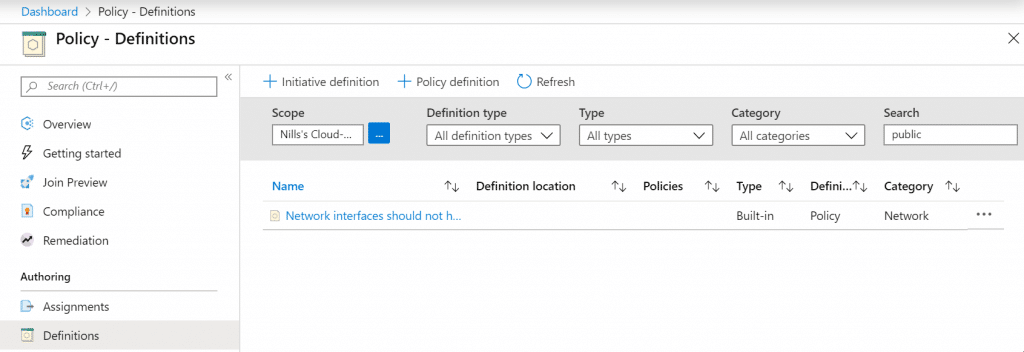
To see this policy, head on over to the Policy blade in the Azure portal, head to definitions and search for ‘public’, That should return 1 policy:
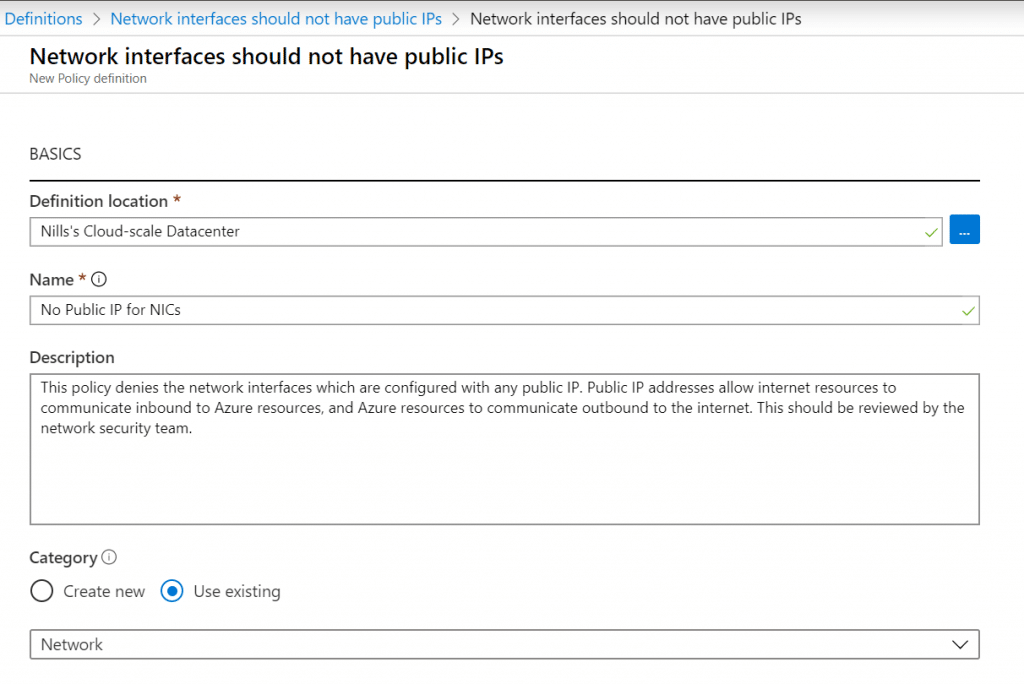
As we’ll be making changes to this example, let’s go ahead and duplicate this policy so we can make change to it down the line. To do this, open the policy and hit the duplicate button in the portal. You’ll get a prompt asking you for a location – where you’ll select your subscription – and for a new name. Then hit the save mark in the bottom.
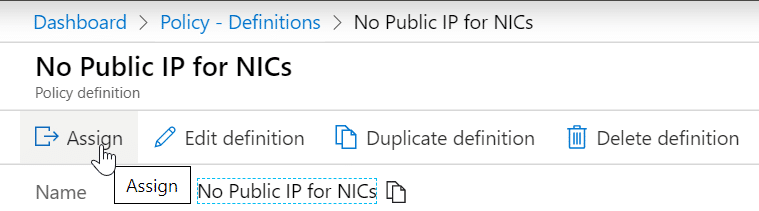
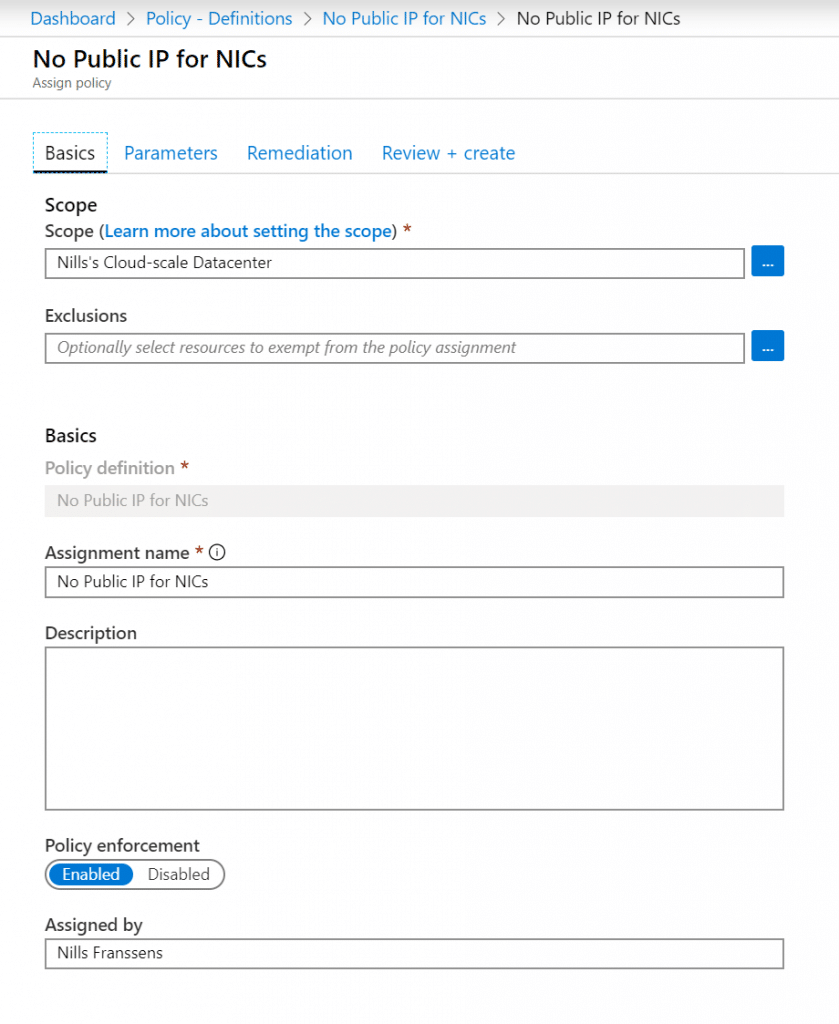
Let’s now go ahead and assign this policy to our subscription. Please be careful here, because this will deny everybody from creating a NIC with a public IP address. To do the assignment, go back to the all policy definitions, select the new policy we just created and hit the Assign button.
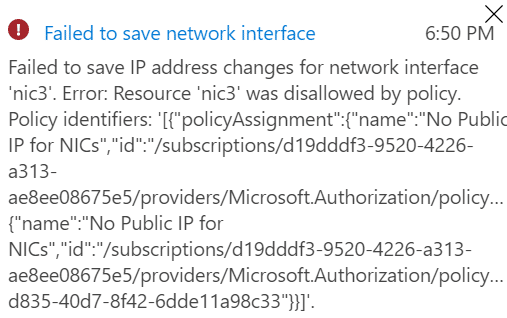
Now that the assignment is in place, let’s try to add a public IP to an existing NIC.
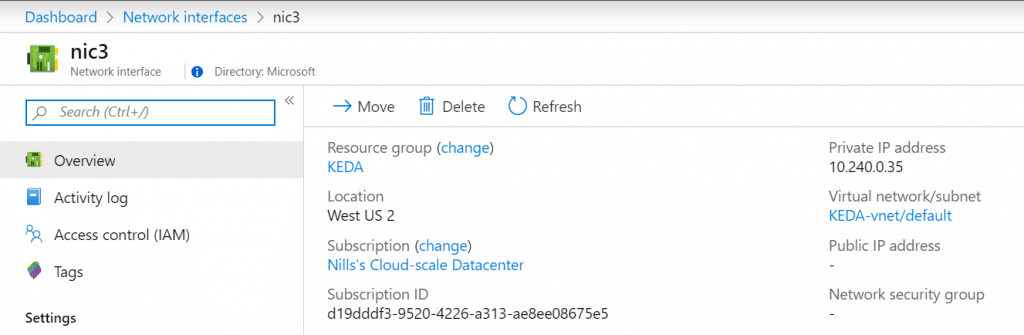
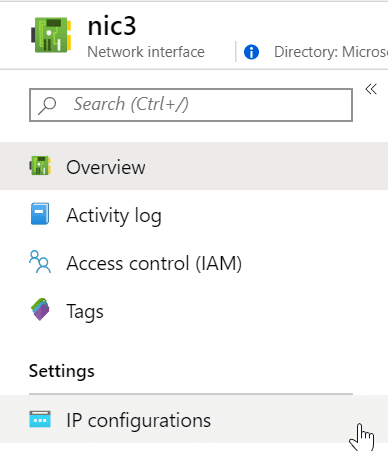
Head on over to the IP configurations, to add a public IP. Just select the first IP configuration, and add a public IP to that ipconfig.

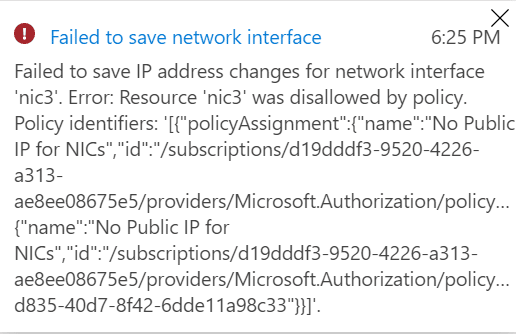
Once you added that public IP and hit save, you should see an error message pop up describing that our policy is blocking the adding of this public IP address.
Editing the policy to only apply to certain VNETs
So, that was a good v1 of our policy. Let’s now try to edit this so it only applies to certain VNETs and not all VNETs. At this point, I want to also take a second to explain why we applied this policy to the full subscription and not to resource of the VNET.
If you read the policy definition, you’ll see that the policy actually evaluates the NIC, and not the VNET. And NICs are allowed to be in separate resource groups from their VNET. This would make a scope of resource group quiet powerless.
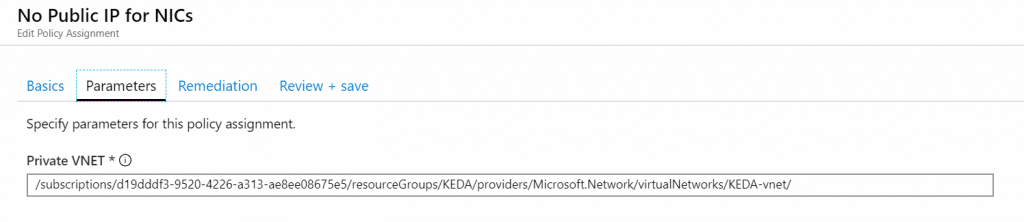
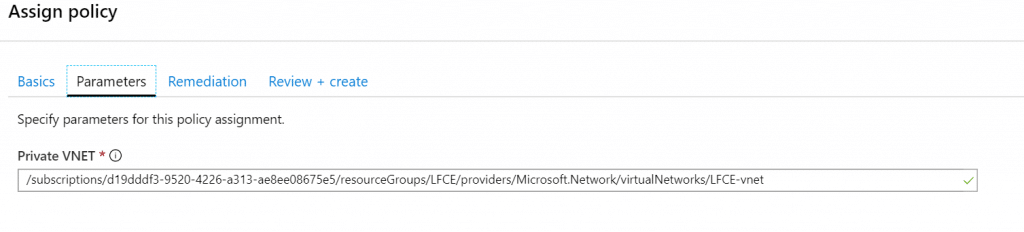
Hence, we’ll edit our policy to take in a parameter of VNET name that will be blocked. This edited policy looks something like this:
{
  "mode": "Indexed",
  "policyRule": {
    "if": {
      "allOf": [
        {
          "field": "type",
          "equals": "Microsoft.Network/networkInterfaces"
        },
        {
          "not": {
            "field": "Microsoft.Network/networkInterfaces/ipconfigurations[*].publicIpAddress.id",
            "notLike": "*"
          }
        },
        {
          "field": "Microsoft.Network/networkInterfaces/ipconfigurations[*].subnet.id",
          "contains": "[parameters('vnets')]"
        }
      ]
    },
    "then": {
      "effect": "deny"
    }
  },
  "parameters": {
    "vnets": {
      "type": "String",
      "metadata": {
        "displayName": "Private VNET",
        "description": "The VNET ID that cannot have public IPs"
      },
      "defaultValue": "/subscriptions/d19dddf3-9520-4226-a313-ae8ee08675e5/resourceGroups/KEDA/providers/Microsoft.Network/virtualNetworks/KEDA-vnet/"
    }
  }
}
As you can see in the code above, we added two elements to our policy:
- Another field in the PolicyRule, that says that if the subnetID contains the VNET ID then public IPs should be blocked.
- A paramter that is a VNET ID. This way, we can assign this policy multiple times for multiple VNETs.
Let’s test this out. We don’t need to update our existing Policy assignment, as that took the default parameter:
Let’s however create a second assignment, for another VNET that cannot have public IP addresses:
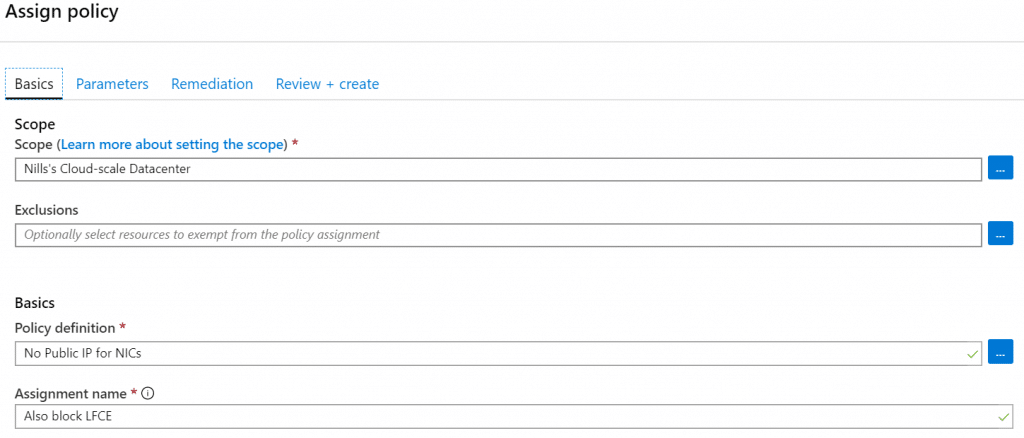
Let’s now test this out, first in my KEDA-VNET:
Let’s also test this in my LFCE-VNET:
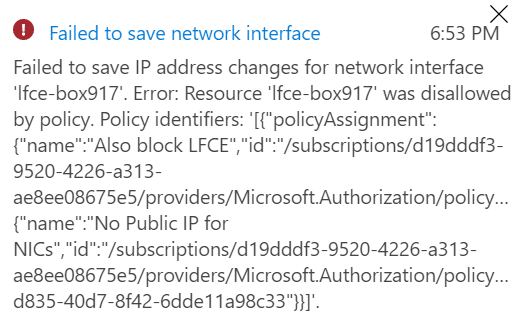
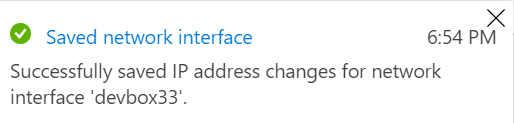
Let’s now test this in an VNET not covered by the policy:
Conclusion
In this post we used Azure Policy to block public IPs from getting assigned to NICs. That way you can protect VMs from getting a direct public IP on the NIC. We slightly changed the default built-in policy, so it can be applied to a whole subscription but only cover a subset of the VNETs.