I am working with a customer that has the use case of running nested virtual machines on Azure. They’re using KVM and QEMU today, and I wanted to prove out that it is possible to run VMs using KVM and QEMU on Azure.
KVM is a technology that allows you to run full virtual machines on top of Linux. KVM can access hardware virtualization technologies, meaning Intel VT or AMD-V. Without going in to much depth, Intel VT and AMD-V make it a lot more performant to run virtual machines, by offloading some of the virtualization translation steps to actual hardware.
KVM is typically used in combination with QEMU. QEMU is an open-source emulator that enables virtualization. QEMU makes use of KVM to access the Intel VT or AMD-V technologies.
To make working with KVM and QEMU easier, you can use libvirt. Libvirt is a toolkit to manage virtual machines. It interfaces with KVM and QEMU (or other platforms) to create and manage virtual machines. Rather than having to issue commands against the KVM or QEMU API, you typically use libvirt to issue the commands.
To make all of this work in Azure, you’ll need to use a machine type that supports nested virtualization. The Dv3 and Ev3 support nested virtualization.
In this post I’ll describe how to create a VM using nested virtualization, and how to get access to that VM. Let’s get started.
Setting up the VM and installing all the required tools.
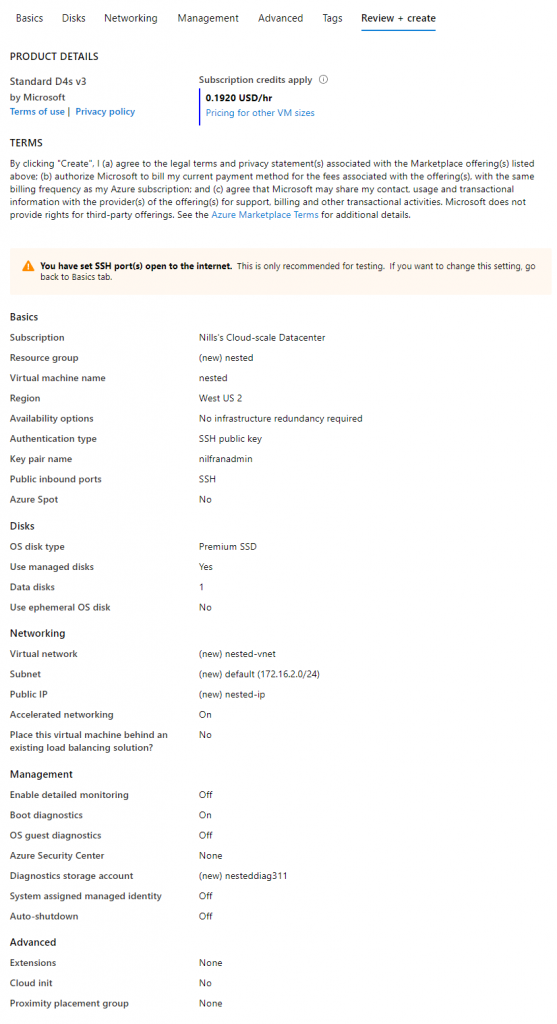
To start, we’ll need to create a new VM. I decided to go for a D4sv3, and I attached an additional 128GB premium disk to this new VM. I’ll use this additional disk to store the virtual disk for the target VM.
Once the VM is up and running, SSH into it and run the following commands to install all the required tools:
sudo apt-get update
sudo apt-get install -y qemu qemu-kvm libvirt-bin  bridge-utils  virt-manager
sudo service libvirtd start
sudo update-rc.d libvirtd enable
To verify that everything is running as expected, you can run the following command:
service libvirtd statusWhich should show you something similar to:

Setting up storage
To set up storage, we’ll have to do two tasks:
- Mount the data disk
- Create a pool in KVM
To mount the disk, we’ll have to follow a couple of steps. First let’s create a partition table on the disk by using fdisk.
sudo fdisk -l #note device name, /dev/sdc in my case
sudo fdisk /dev/sdc
# n to create new partition
# p to make primary
# 1 to create first partition
# default
# default
# w to write and quit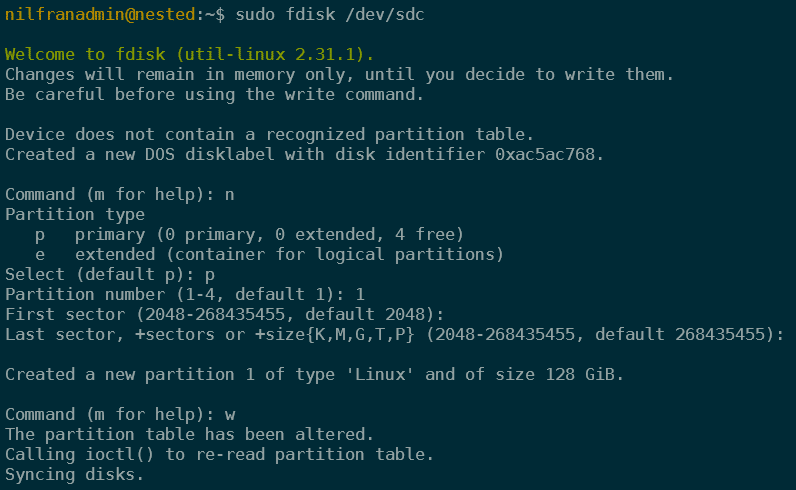
Next we’ll setup a file system using the following command:
sudo mkfs.ext4 /dev/sdc1And finally mounting the drive:
sudo mkdir /vms
sudo mount /dev/sdc1 /vms
To make our mount persist across reboots, we’ll also add an entry in the file system table (/etc/fstab)
#first make a backup of /etc/fstab
sudo cp /etc/fstab /etc/fstab.backup
sudo bash -c 'echo "/dev/sdc1 /vms ext4" >> /etc/fstab'
Next up, we have to create the storage pool that KVM/Qemu will use:
sudo virsh pool-define-as vms-store --type dir --target /vms
sudo virsh pool-start vms-store
sudo virsh pool-autostart vms-store
Networking
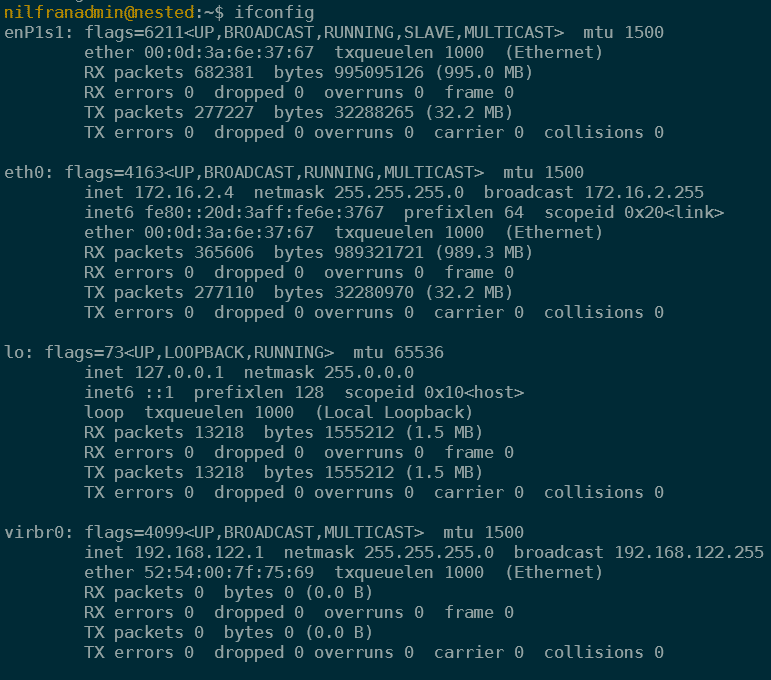
The default installation created both a DHCP server and a virtual network bridge. To confirm the network bridge was setup, run an ifconfig.
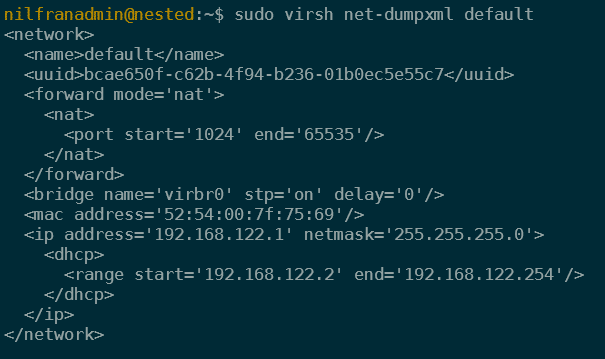
KVM/QEMU will use that network interface. To verify that configuration, run the following command:
sudo virsh net-dumpxml defaultWhich will show you something like:

We’ll revisit networking later on in this post to enable an external IP for the hosted VM. But for now, we can go ahead and create a first VM.
Creating a nested VM from an ISO
With storage and networking, setup, we can go ahead and create a first virtual machine. To start, let’s download an ISO to install. In my case, I’ll run Ubuntu 18.04, and I’ll download the ISO on the temp drive of the VM.
sudo wget http://releases.ubuntu.com/18.04.4/ubuntu-18.04.4-live-server-am
d64.iso?_ga=2.17338928.809071564.1585082124-624042363.1585082124 -O /mnt/ubuntu.iso
With the ISO present, we can go ahead and create a VM.
sudo virt-install --virt-type=kvm --name=ubuntu-iso \
  --ram 1024 --vcpus=1 --virt-type=kvm --hvm \
  --cdrom /mnt/ubuntu.iso --network network=default \
  --disk pool=vms-store,size=20,bus=virtio,format=qcow2 \
  --graphics vnc
This will start the VM creation process. We will need to finish the installation process by connecting to the console. To connect to the console, we’ll need to get the VNC port that our VM is using, tunnel VNC traffic over SSH, and then run a VNC viewer.
To start, get the VNC port.
sudo virsh dumpxml ubuntu-iso | grep vncThen, open a new SSH connection and tunnel that port of the connection. In my case, I’m running this on WSL, so I’ll tunnel over the SSH connection in a new tab. If you’re using putty, this can also be configured. In WSL use the following command:
ssh nilfranadmin@52.191.133.169 -L 5900:127.0.0.1:5900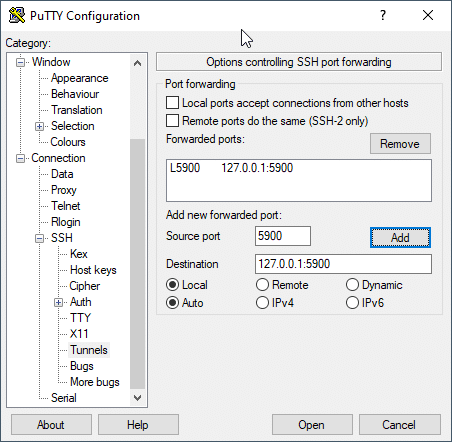
Once the tunnel is up, you need to install VNC viewer. Then you open VNC viewer and connect to 127.0.0.1:5900. This will show you the remote connection:
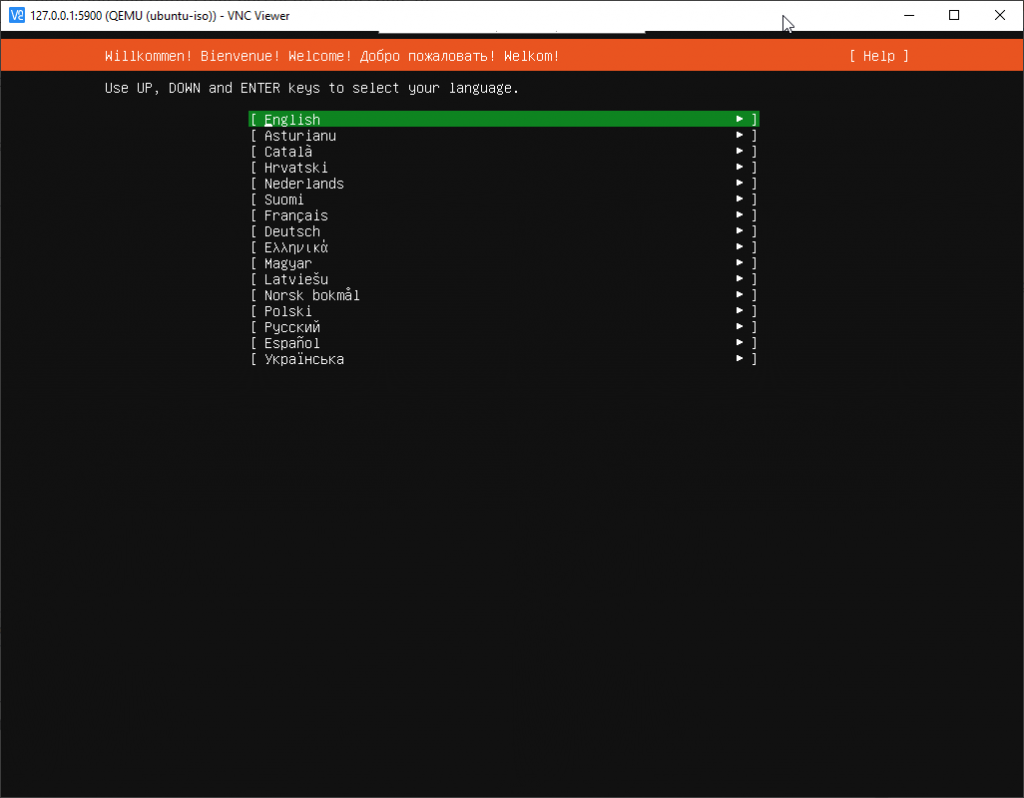
We will use this terminal to finish creating the VM, and complete the installation.
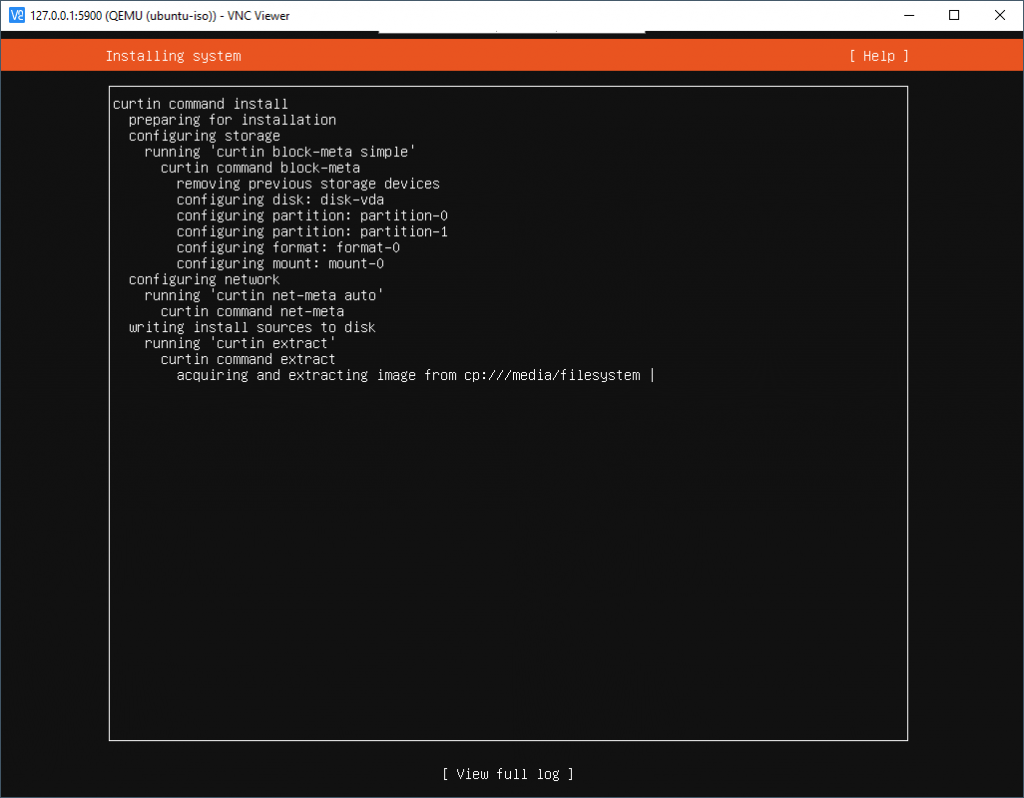
Once the installation is complete, you’ll have to manually start the VM again, using the following command:
sudo virsh start ubuntu-isoFinally, we will connect to the VM again using VNC and install an apache web server.
sudo apt-get update
sudo apt-get install apache2 -y
In the next step we will direct a public IP address on Azure to the virtual machine.
Mapping an Azure Public IP to the nested VM
As a final step, I want to map a public IP in Azure to the VM in the nested virtual machine. I don’t want to use the VMs primary public IP address, I want to use a different address. This can be achieved by adding a secondary ip configuration to the NIC of the hypervisor.
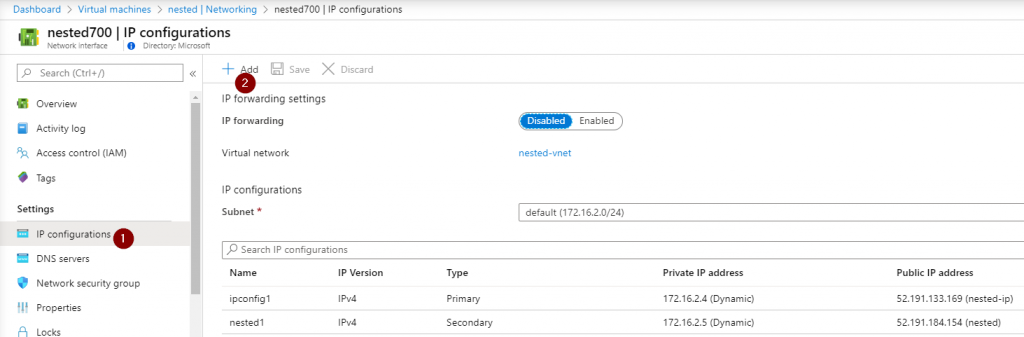
Next, we’ll want to configure this IP address on the network interface. If you reboot, you don’t have to execute this command again, because Azure will send the secondary IP via DHCP as well.
sudo ip addr add 172.16.2.5 dev eth0And finally add a iptables route to forward any traffic coming into our VM on that IP to the IP of the VM. (to get the IP of the VM, do a ifconfig in the VM). (in the below, 172.16.2.5 is the secondary IP of my NIC, and 192.168.122.215 is the IP of the nested VM).
sudo iptables -I FORWARD 1 -o virbr0 -m state -s 0.0.0.0/0 -d 192.168.122.0/24 --state NEW,RELATED,ESTABLISHED -j ACCEPT
sudo iptables -A PREROUTING -t nat -d 172.16.2.5 -p tcp --dport 1:65535 -j DNAT --to-destination 192.168.122.215:1-65535
When this is complete, you should be able to connect to the public IP on the secondary IP config of the NIC:
And that’s it for now. We now have a nested VM running using KVM and Qemu.
Summary
In this post, we used KVM, Qemu and libvirt to deploy a VM in a VM. We changed the networking configuration so we could expose the VM running in the VM using a public IP.