
I can’t begin to count the amount of times I screwed up a virtual machine that wouldn’t boot anymore. In most cases, that was due to messing up /etc/fstab, which controls which disks get mounted in Linux. If that file is broken, your machine won’t boot anymore.
In Azure, there’s an ability to swap the OS disk of a machine. That means you can swap in a working drive to fix the issues with your VM. I hope you never need to use it, but if you need it, it’s there for you.
In this post, I want to quickly explain how to do this and how you can use OS disk swap to get your VM back to a working state.
Process for fixing issues
Let’s walk through the process I typically use in cases where I need to swap the OS drive:
- Take a snapshot of the broken OS disk.
- Create a new disk based of this snapshot.
- Attach new disk to a working VM.
- Fix issues in working VM.
- Detach disk.
- Swap OS disk.
In summary, I create a copy of the disk, fix the issues and then swap the OS drive. You cannot detach the OS drive from a VM, since a VM always needs to have an OS drive (except for VMs using ephemeral storage).
With the process covered, let’s have a look at a working example:
Fixing a broken VM using OS disk swap
Breaking my VM
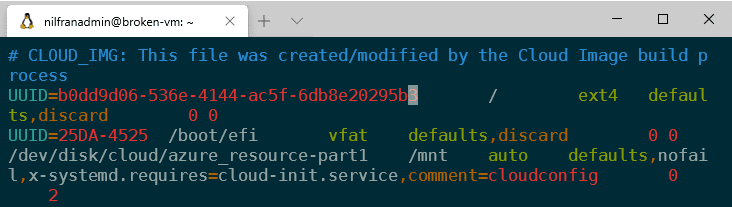
For my test setup, I pre-created 2 VMs running Ubuntu 18.04. Let’s login to the VM we plan to break, and make a change in /etc/fstab. I’ll remove the last digit of the ID of the boot disk.
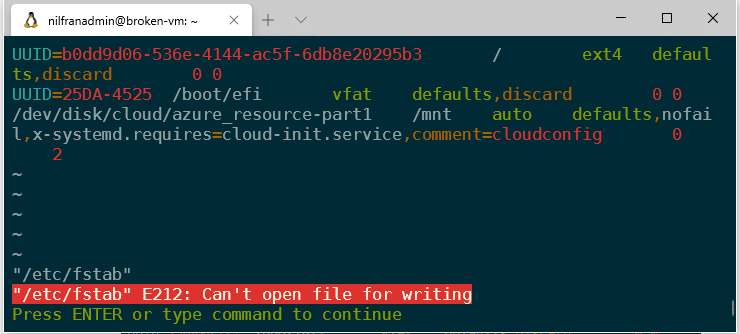
And then I’ll do a reboot of the VM (in my case, from the Azure portal). This will cause the reboot, and this should cause the disk failure to present itself. I wasn’t expecting the VM to actually boot – but it did – and I could still connect to it using SSH. But while working on the VM, I ran into many issues. Just one of those was that I couldn’t restore the fstab file. Apperently the file system was mounted read-only, not read-write.
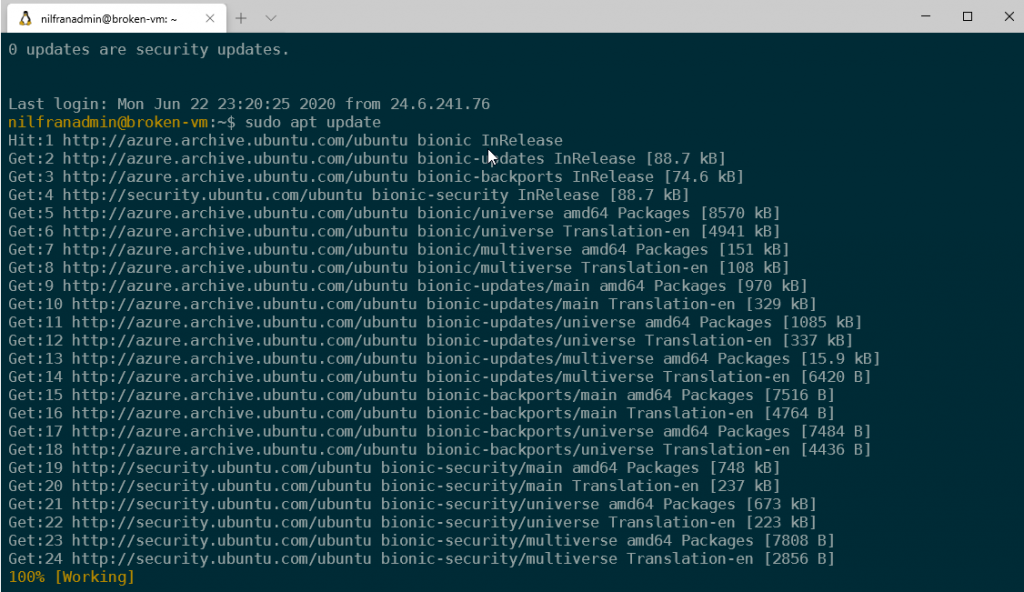
Also, trying to run sudo apt update resulted in many errors:

In summary, not the issue I was expecting, but broken nonetheless. Let’s go ahead and fix it!
Take a snapshot of the broken OS disk
First step is to take a snapshot of the OS disk. This can be done either via PowerShell/CLI or in the portal. For the purpose of this post, I’ll use the portal route.
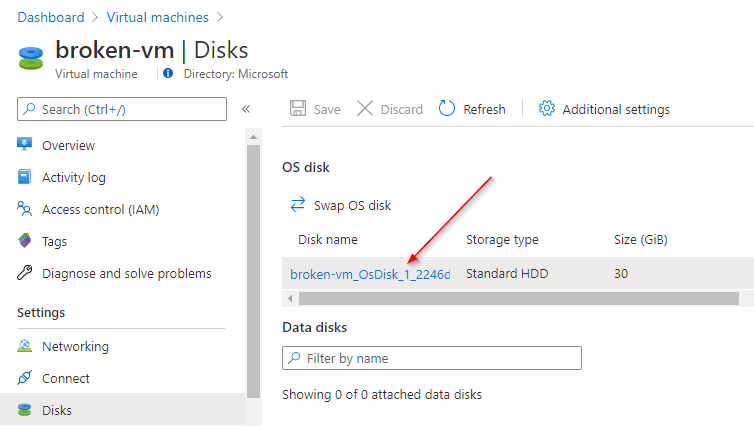
To take the snapshot, first navigate to your broken OS disk. You can get there via the Disks part of the VM blade:
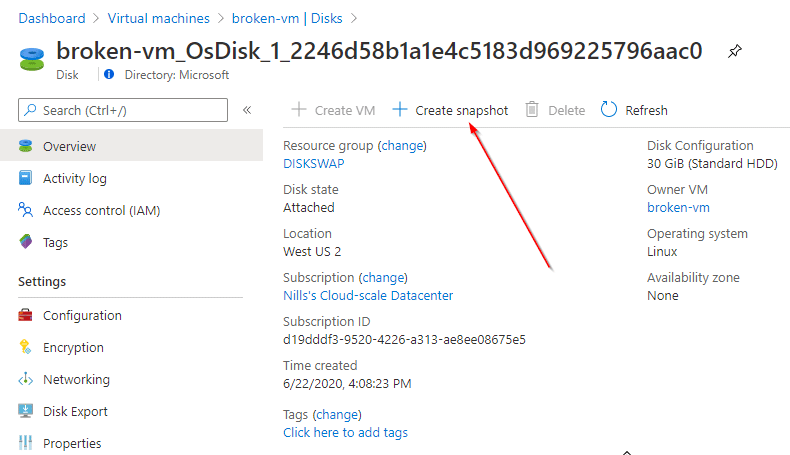
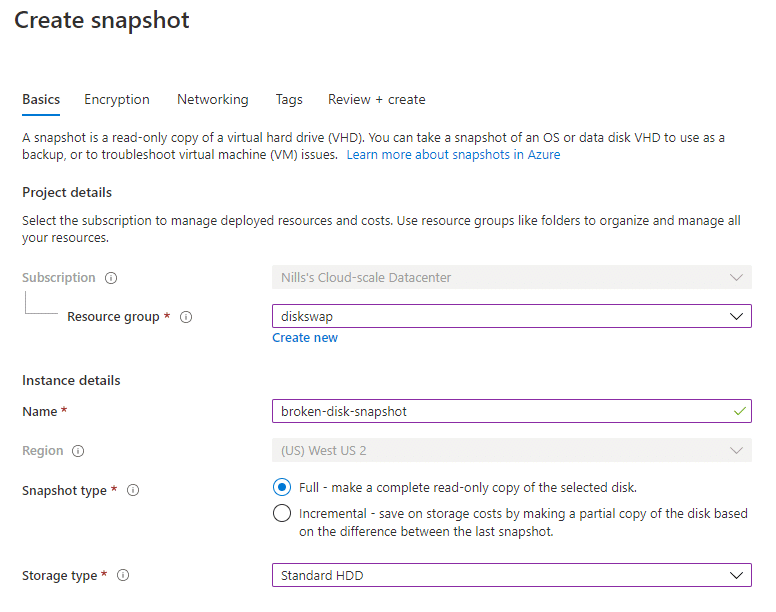
In the resulting disk blade, you’ll see the ‘Create snapshot’ option. Click that.
In the next blade, provide the necesarry details for the snapshot and hit Review and Create.
Create a new disk based of this snapshot
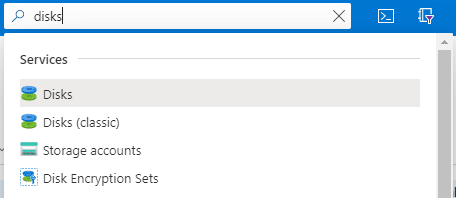
Next up, we’ll create a disk from this snapshot. This cannot be done from the snapshot blade itself, you’ll have to navigate to the disk blade for this. To get there, just type disks in the search bar.
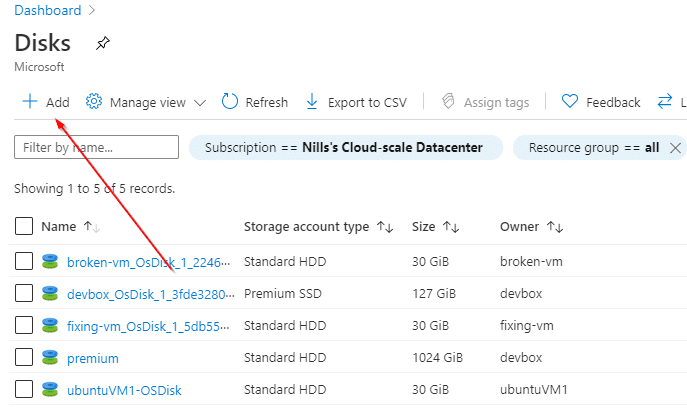
Once there, hit the Add button on the top.
What you’ll need to do here is set the source type to snapshot, and refer to the snapshot we just created.
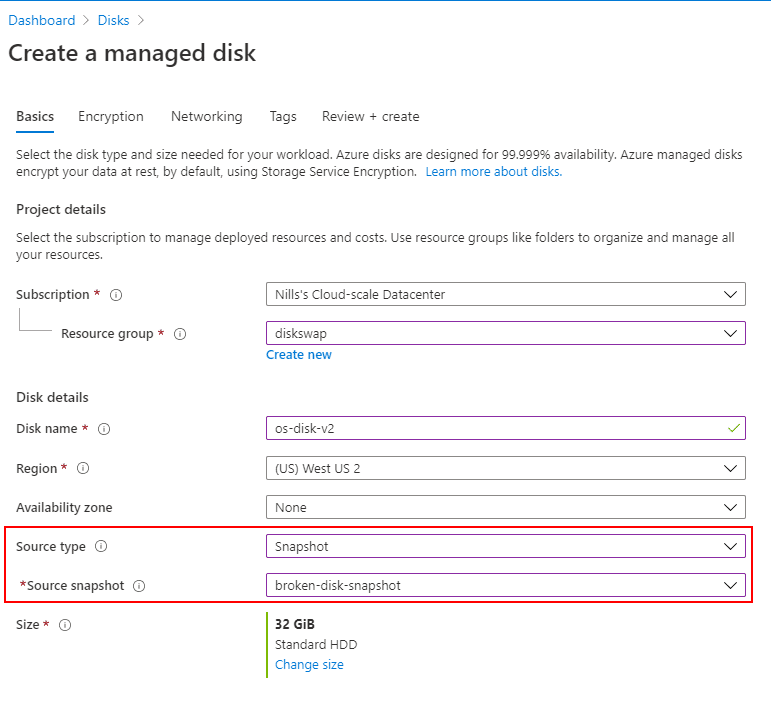
Hit create, and give it some time to create. Then we can attach it to the working VM.
Attach new disk to a working VM
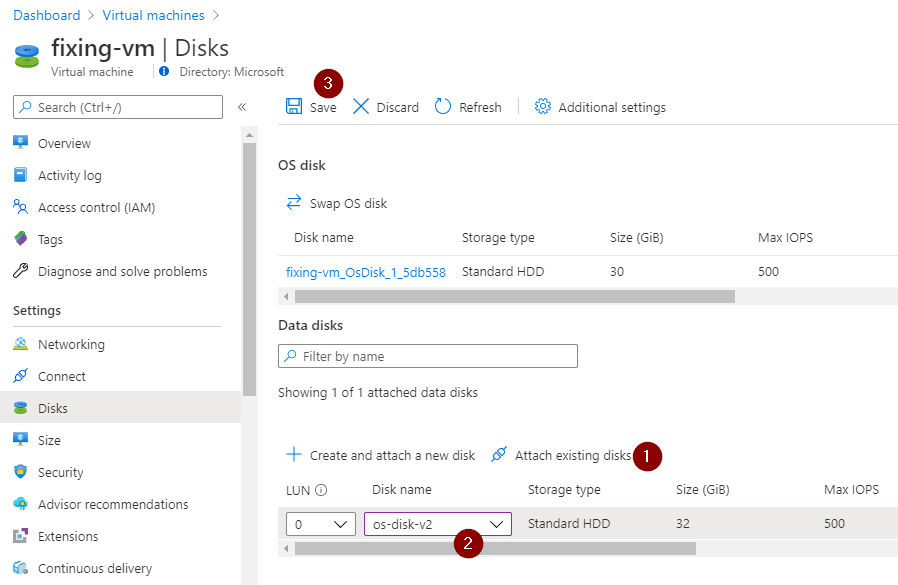
In the VM blade of the VM that you’ll use to fix this issue, navigate to the disks blade and hit the “Attach existing disks” button. Look for the disk we just created, and hit the save button.
Give it a couple seconds to attach the disk. Once the disk is attached, connect to your VM, and mount the new disk. The commands I typically use for this:
sudo fdisk -l
#now look for the /dev/sdX of the new disk.
sudo mkdir /mnt/broken-disk
sudo mount /dev/sdX1 /mnt/broken-disk
And with the mount done, we can now fix the issue.
Fix issues in working VM.
Fixing the issue in this case is as easy as adding the digit back into the /etc/fstab file. In this case, that file will be at location /mnt/broken-disk/etc/fstab.
I added the ‘3’ back in, and saved the updated file. Let’s move to the next step.
Detach disk
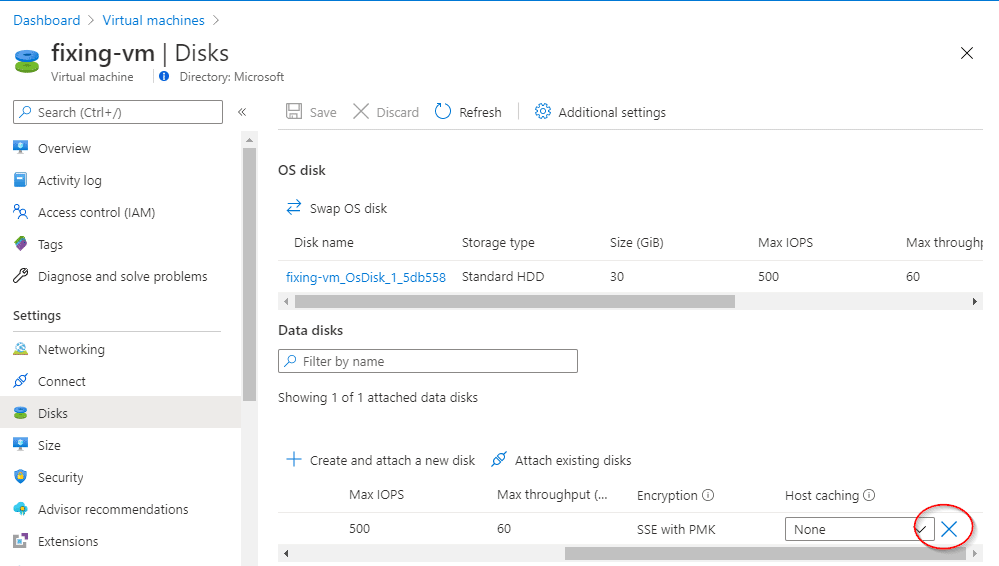
To detach the disk, navigate back to the disk blade on the fixing VM. On the line of the disk we just attached, navigate to the right part of the screen, hit the ‘X’ and hit the save button.
With the disk detached, we can now swap the OS drive.
Swap OS disk
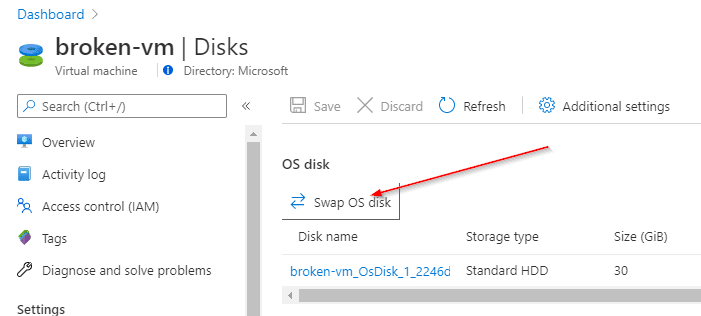
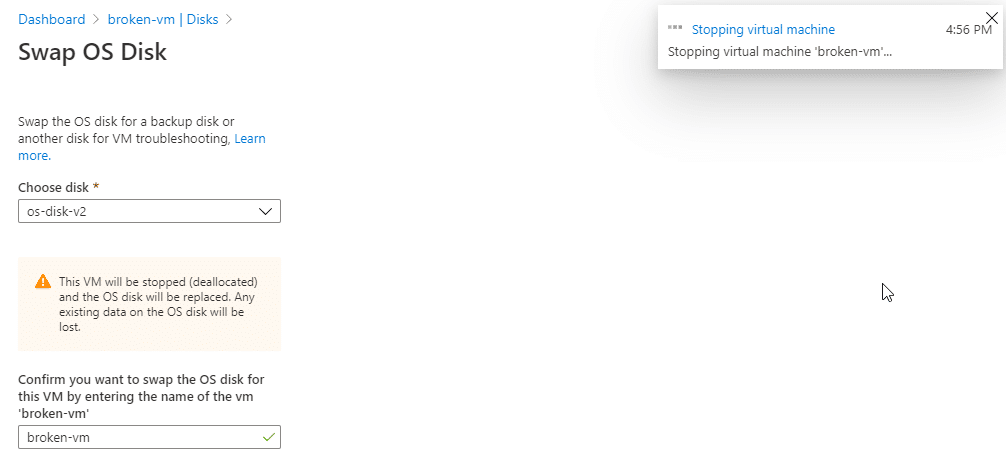
Navigate to your broken VM, open the disks section of the VM blade and hit the Swap OS disk button.
Pick the disk you want to swap in, and confirm the action by typing in the VM name.
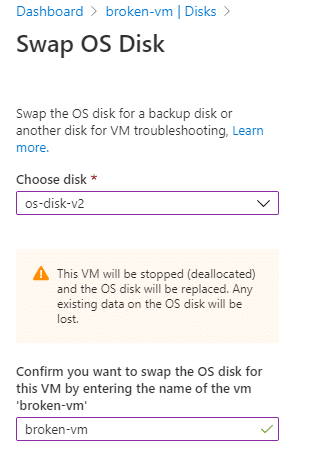
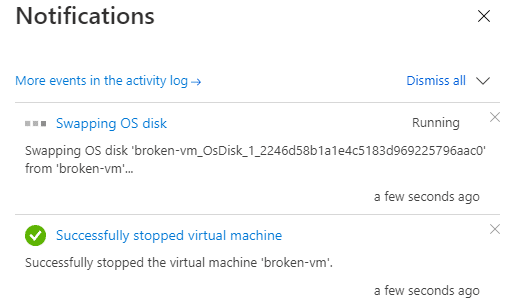
Interestingly enough, hitting the OK button for this, will cause Azure to stop your VM first. I was wondering if this was going to create an error because my VM was still running, but Azure was smart enough to first stop the VM.
Once the VM is stopped, this will trigger the OS disk swap:
It doesn’t trigger an automatic start of the VM, so hit the start button to see if our issues have been fixed. And in my case – as expected – everything worked normally again. I could do my apt-get update without issue (where it failed earlier).
Summary
There’s numerous ways in which you could mess up a VM and make it unable to boot. Having the swap OS disk option is a great option to quickly fix issues. This shouldn’t deter you from setting up good back-up and restore capabilities (e.g. Azure backup), however, swapping the OS disk can be a great quick fix to a number of issues.
Although I described a Linux focused solution here, you can do the same thing with Windows boxes, if you know which files to fix.