Pulumi is a somewhat new kid on the infrastructure-as-code block. I’ve been looking for an opportunity to work with Pulumi for a while, and a recent customer engagement caused me to investigate it in a bit more detail. This led me to create this post, exploring how to create a private AKS cluster and a VM to connect to it using Pulumi.
In this blog post, I’ll start with introducing the Pulumi tool, explain how to install it, then walk through the quickstart experience, and finally how to use it to create a private AKS cluster.
As I finished this example, I had a couple of thoughts about Pulumi:
- The installer and the CLI tooling are great. The installation went flawless, and the CLI is way above-par and nice to work with.
- I didn’t like the fact that you have to use the web service to get started. However, it is a very useful service with additional detail about your deployments. The web service is very valuable, it keeps a backlog of all your deployments, shows you the resources per stack, and gives you a good oversight of all your environments.
- The tooling is well integrated with git. It reads metadata from a git repo (if deployed from a repo) and sends that to the web service as well. This means that you can link deployment history with commit history. I haven’t used it yet from a CICD pipeline, but I can see metadata flow through as well and that’s pretty useful.
- It’s amazing that you can use built-in language primitives rather than having to learn a bunch of DSL-specific functions. For loops, string concatenation, if statements are all available for you to create your infrastructure.
- There are two versions of the Pulumi SDKs for Azure , a Pulumi native one (called azure_native) and one that is an abstraction around Terraform for Azure (called azure). It was confusing as I got started and I didn’t know about both versions. Also, the documentation website isn’t optimal to work with.
- (in the pulumi_azure_native SDK) Although Pulumi doesn’t require you to learn a new language (you can use TypeScript, JavaScript, Python, Go or .NET), the object constructors are involved enough to require you to learn about how Pulumi does things. For example, a security rule in a network security group isn’t a JSON string, it is a custom object (SecurityRuleArgs) that you need to construct. This isn’t a huge issue but does slow down development a bit. You’ll see multiple examples of this in the code for the AKS cluster later on.
In this blog post, I’ll be using Pulumi and Python to create a private AKS cluster. There are two code samples on GitHub associated with this blog post:
And with that, let’s get started!
What is Pulumi
Pulumi is an infrastructure as code (IaC) tool. It serves the same function as ARM templates, Bicep, or Terraform.
Pulumi is different in that it uses regular programming languages as the language to define your infrastructure (TypeScript, JavaScript, Python, Go, and .NET). An Azure ARM template uses JSON while Bicep and Terraform use a domain-specific language (DSL). Pulumi’s approach has the advantage that you can use all the native language operations around your infrastructure and don’t have to learn a new language for certain functions (for those who have written an ARM template, you know how difficult it can be to do string concatenation or refer to the id of a resource).
This makes it easy to create logic around your infrastructure. For example, an if-statement or a for-loop can use the built-in ways to do so in the language you’re using.
Yet another tool, so this begs the question: “Which IaC tool should I use (for Azure)?”. I don’t have a straight-up answer for you, as it depends. If you have existing experience with Terraform or Pulumi working with another cloud, use what you’re familiar with. If you don’t have experience with either, I would suggest starting with using either ARM templates or Bicep. These are the Azure native solutions, are supported by Microsoft, and will have day-one support for most features in Azure.
Next up: installing Pulumi:
Installing Pulumi
I will be installing on WSL running Ubuntu. For the full installation guide or how to install it on different platforms, please refer to the Pulumi documentation.
Installing Pulumi is as easy as running the following command:
curl -fsSL https://get.pulumi.com | shThis worked great in my case, and installed Pulumi without requiring root access and added itself to the path in my .zshrc file.

I opened a new WSL terminal and was able to run the Pulumi CLI.
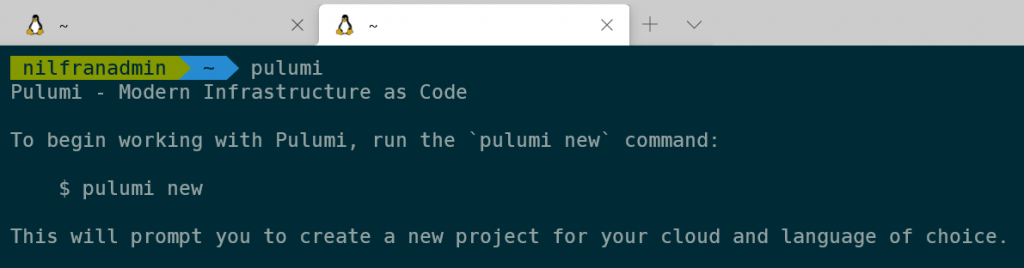
Excellent experience installing Pulumi 👌.
Pulumi uses the online Pulumi service to deliver its end-to-end experience. You will need an account from their service to use Pulumi. Go to https://app.pulumi.com/ and create an account. I linked it to my GitHub account.
Now, login to their CLI to get started. To do so, run:
pulumi loginYou can hit enter to get an interactive login screen like I did:

The login was easy enough. However, I don’t know how I feel about the requirement of using the online service to get the tool to work. It feels like a forced way to push you towards using the paid version once you graduate from single-user to team.
Anyway, let’s continue and create our first resources using the quickstart:
Quickstart experience
Before creating the actual AKS cluster, let’s go through the quickstart experience. This is using the example from the Pulumi documentation.
First: credentials. Pulumi can either use your user credentials or a service principal. In my case, I’ll be using my own credentials. To access those, Pulumi uses the token stored by the Azure CLI. If you aren’t logged in using the Azure CLI, you can do so using:
az loginNext, make sure you have Python, pip and python-venv installed if you wish to use Pulumi with Python:
sudo apt install python3 python3-venv python3-pip -yLet’s start with creating the Pulumi code.
pulumi new azure-pythonThis will take you through a wizard to create the project, after which you’ll have a simple scaffold available in your directory:
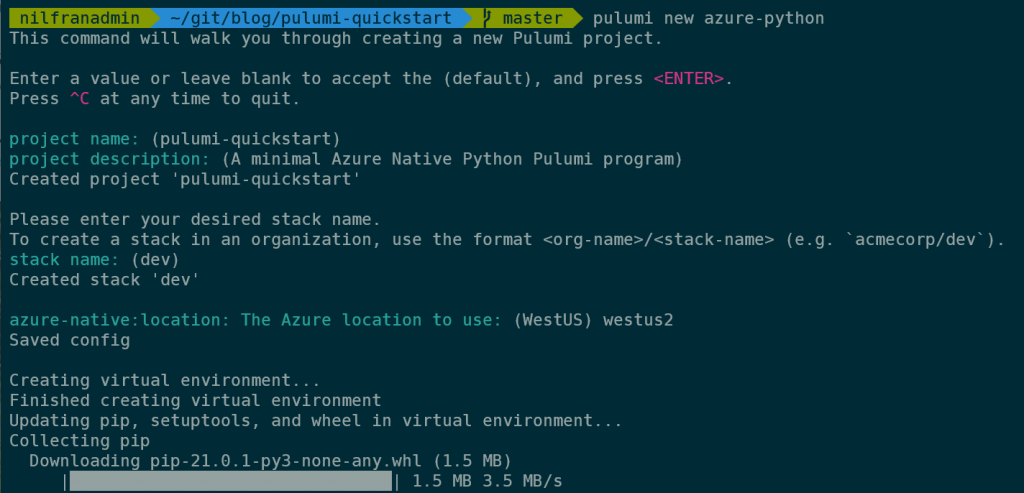
This also registers the project with the online service:
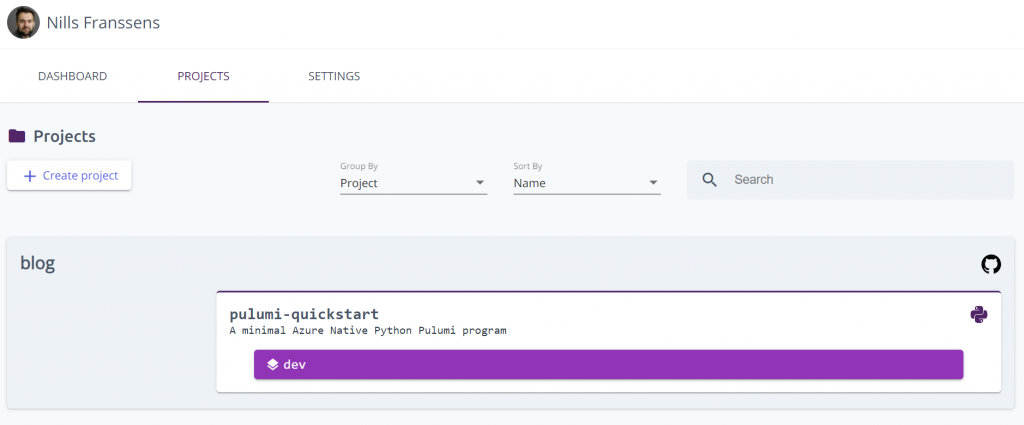
As you can see, this picked up on the git repo this project got created in.
The wizard created a number of files locally:
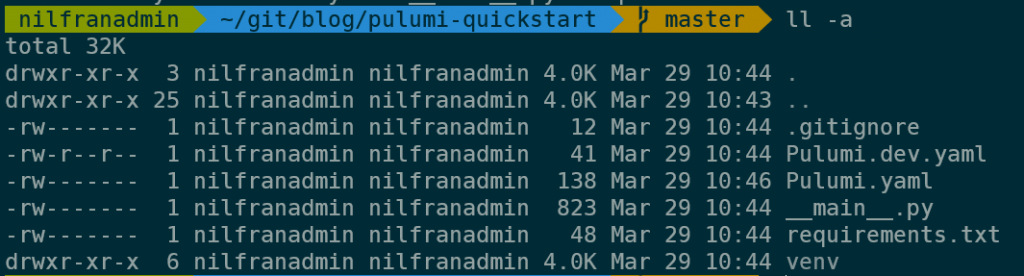
The two YAML files in the directory are used for defining the project and configuration data for the stack. This is the content of those files:
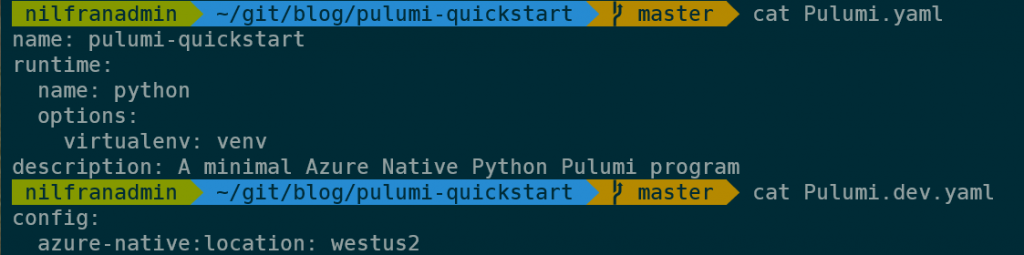
The actual infrastructure as code is contained in the __main__.py file, which contained the following code to start with:
"""An Azure RM Python Pulumi program"""

import pulumi
from pulumi_azure_native import storage
from pulumi_azure_native import resources

# Create an Azure Resource Group
resource_group = resources.ResourceGroup('resource_group')

# Create an Azure resource (Storage Account)
account = storage.StorageAccount('sa',
    resource_group_name=resource_group.name,
    sku=storage.SkuArgs(
        name=storage.SkuName.STANDARD_LRS,
    ),
    kind=storage.Kind.STORAGE_V2)

# Export the primary key of the Storage Account
primary_key = pulumi.Output.all(resource_group.name, account.name) \
    .apply(lambda args: storage.list_storage_account_keys(
        resource_group_name=args[0],
        account_name=args[1]
    )).apply(lambda accountKeys: accountKeys.keys[0].value)

pulumi.export("primary_storage_key", primary_key)
This script will create a resource group, a storage account and then output the storage account key.
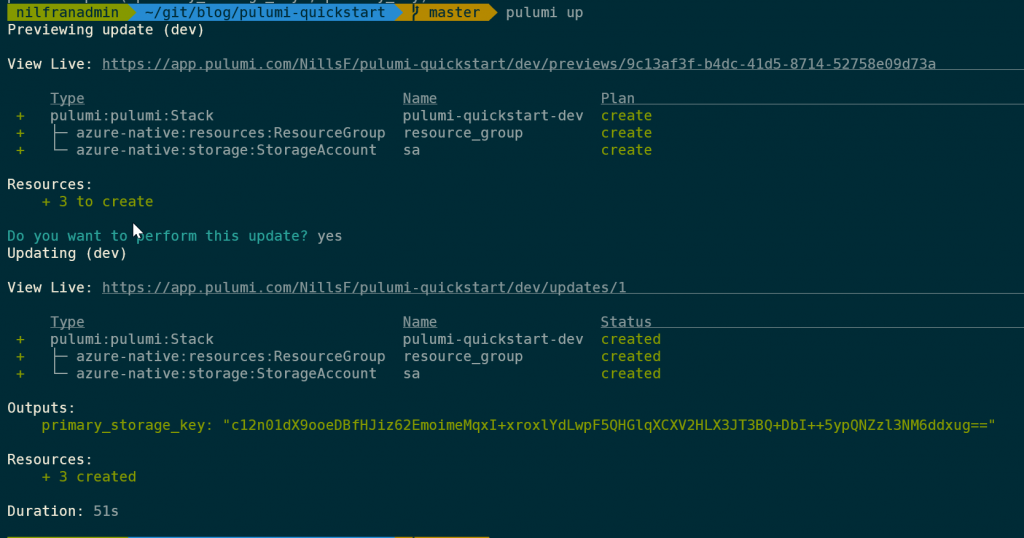
Let’s create the resources:
pulumi upAs with Terraform, Pulumi shows a plan of which resources it will create/modify. The output is pretty nice, continuously showing which resources are being created.
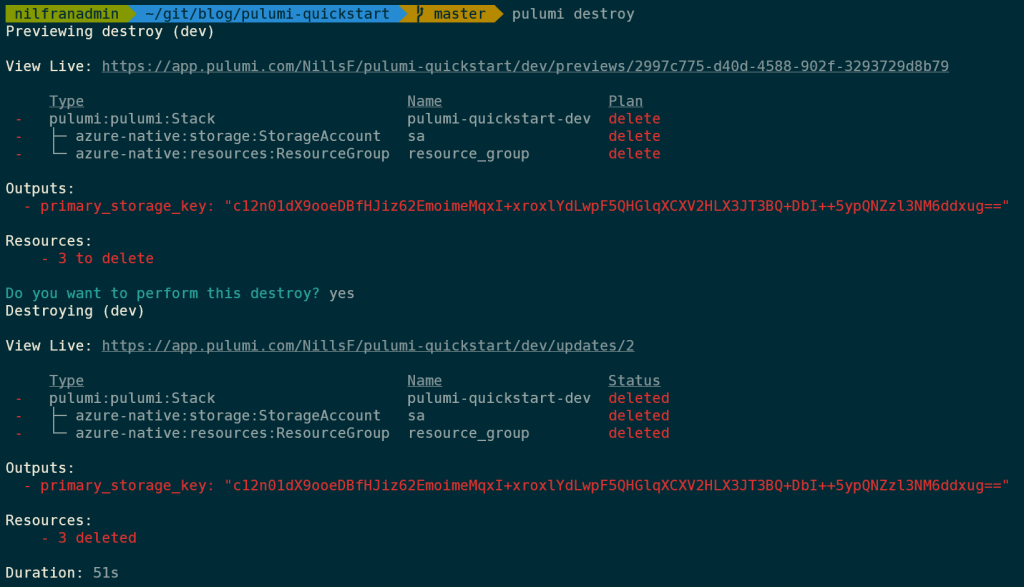
This was easy enough. To delete the resources, you can use:
pulumi destroyWhich will tear down the resources that Pulumi created for you.
And with that, we’re ready to have a look at how to have Pulumi create a Private AKS cluster.
Private AKS cluster using Pulumi
To create a Private AKS cluster, we’ll have to get Pulumi to create the following resources:
- Resource group
- NSG to allow traffic
- VNET
- AKS subnet
- VM subnet – linked to NSG
- AKS cluster
- Public IP for NIC
- NIC
- Public IP
- VM
- Public IP
- Subnet reference
To start, I created a new project using:
pulumi new azure-pythonAnd then started editing __main.py__. I put all the code for the private AKS cluster and the VM in a single Python file (I don’t know what the best practices are from a Pulumi perspective). Let me walk you through all the different resources in that file:
Imports and variables
To start, there’s a couple of imports and a number of variables I have set:
import pulumi
from pulumi_azure_native import storage
from pulumi_azure_native import resources
from pulumi_azure_native import network
from pulumi_azure_native import containerservice
from pulumi_azure_native import compute

# Setting up variables
prefix_name = "pulumiAKS"

vnet_ip_range = "192.168.0.0/16"
aks_ip_range = "192.168.0.0/20"
vm_ip_range = "192.168.16.0/24"

ssh_key = "ssh-rsa AAAAB3<redacted for brevity>"
I’m importing the different Pulumi modules one by one. Another strategy I’ve seen in a lot of the examples is to import pulumi_azure_native as azure_native and call the modules from there (e.g. azure_native.resources.ResourceGroup instead of resources.ResourceGroup as I’m doing).
Resource group
Creating the resource group is similar to what we’ve done earlier in the quickstart. The only difference here is that I’m providing the resource group name in the creation, to avoid having Pulumi add a random hash to the end of the name:
resource_group = resources.ResourceGroup(
    prefix_name+"-rg",
    resource_group_name=(prefix_name+"-rg"))
Network Security Group
Next up is the network security group. This is where I noticed some of the complexities around Pulumi. Let me first share the code itself:
nsg = network.NetworkSecurityGroup(
    resource_name=(prefix_name+"-nsg"),
    network_security_group_name=(prefix_name+"-nsg"),
    resource_group_name=resource_group.name,
    security_rules=[network.SecurityRuleArgs(
        access="Allow",
        destination_address_prefix="*",
        destination_port_range="22",
        direction="Inbound",
        name="Allow-SSH",
        priority=130,
        protocol="*",
        source_address_prefix="*",
        source_port_range="*",
    )])
Most of the arguments in the constructor are strings. However, the security rules aren’t a string or a JSON object, they’re a custom object that needs to be constructed (SecurityRuleArgs in this case). You’ll see throughout this sample that Pulumi frequently uses these custom objects, instead of a simple string. It’s not a big issue once you get used to it (and have IntelliSense setup in VS Code), but it did slow me down a bit.
VNET and subnets
Next up, creating the VNET and the subnets. Here is where you have two options:
- Create the subnets in the VNET object
- Create the subnets as separate objects
I chose to use the second approach because it is easier to reference the individual subnets that way once you link them to either the cluster or the VM. You have to pick either strategy, you cannot combine both strategies as this would cause conflicts.
You’ll also notice that the VM subnet gets linked to the NSG that was created earlier:
vnet = network.VirtualNetwork(
    prefix_name+"-vnet",
    address_space=network.AddressSpaceArgs(
        address_prefixes=[vnet_ip_range],
    ),
    resource_group_name=resource_group.name,
    virtual_network_name=(prefix_name+"-vnet"))

aks_subnet = network.Subnet(
    "aks-subnet",
    address_prefix=aks_ip_range,
    resource_group_name=resource_group.name,
    subnet_name="aks-subnet",
    virtual_network_name=vnet.name)

vm_subnet = network.Subnet(
    "vm-subnet",
    address_prefix=vm_ip_range,
    resource_group_name=resource_group.name,
    subnet_name="vm-subnet",
    virtual_network_name=vnet.name,
    network_security_group=network.NetworkSecurityGroupArgs(
        id=nsg.id
    ))
Private AKS cluster
Next up is the AKS cluster itself. There are a number of configurations that are defined in the constructor for the AKS cluster. Some callouts:
- agent_pool_profiles: here we’re linking this cluster to the subnetID that was created earlier.
- api_server_access_profile: here we enable the private cluster functionality.
- identity: not too important after the fact, but this one shows some of the complications around my feedback of having to use custom objects for simple settings and it took me quite some time to figure this one out.
Those are some of the important callouts. Below is the full Python Pulumi code:
aks_cluster = containerservice.ManagedCluster(
    addon_profiles={},
    agent_pool_profiles=[containerservice.ManagedClusterAgentPoolProfileArgs(
        count=1,
        enable_node_public_ip=False,
        mode="System",
        name="nodepool1",
        os_type="Linux",
        type="VirtualMachineScaleSets",
        vm_size="Standard_D2s_v4",
        vnet_subnet_id=aks_subnet.id
    )],
    api_server_access_profile=containerservice.ManagedClusterAPIServerAccessProfileArgs(
        enable_private_cluster=True
    ),
    dns_prefix=prefix_name,
    enable_rbac=True,
    identity=containerservice.ManagedClusterIdentityArgs(
        type=containerservice.ResourceIdentityType.SYSTEM_ASSIGNED),
    linux_profile=containerservice.ContainerServiceLinuxProfileArgs(
        admin_username="nilfranadmin",
        ssh=containerservice.ContainerServiceSshConfigurationArgs(
            public_keys=[containerservice.ContainerServiceSshPublicKeyArgs(
                key_data=ssh_key,
            )],
        ),
    ),
    network_profile=containerservice.ContainerServiceNetworkProfileArgs(
        load_balancer_sku="standard",
        outbound_type="loadBalancer",
        network_plugin="azure"
    ),
    resource_group_name=resource_group.name,
    resource_name=(prefix_name+"-aks"),
    sku=containerservice.ManagedClusterSKUArgs(
        name="Basic",
        tier="Free",
    ))
Virtual Machine
For the virtual machine, I needed to create a public IP, a NIC, and then the machine itself. Again, there’s a decent amount of configuration in the VM object, as you can see in the code below:
pip = network.PublicIPAddress(
    resource_name=(prefix_name+"-pip"),
    public_ip_address_name=(prefix_name+"-pip"),
    resource_group_name=resource_group.name
)

nic = network.NetworkInterface(
    resource_name=(prefix_name+"-nic"),
    ip_configurations=[network.NetworkInterfaceIPConfigurationArgs(
        name="ipconfig1",
        public_ip_address=network.PublicIPAddressArgs(
            id=pip.id,
        ),
        subnet=network.SubnetArgs(
            id=vm_subnet.id,
        ),
    )],
    network_interface_name=(prefix_name+"-nic"),
    resource_group_name=resource_group.name
)

vm = compute.VirtualMachine(
    resource_name=(prefix_name + "-vm"),
    hardware_profile=compute.HardwareProfileArgs(
        vm_size="Standard_D2s_v4",
    ),
    network_profile=compute.NetworkProfileArgs(
        network_interfaces=[compute.NetworkInterfaceReferenceArgs(
            id=nic.id,
            primary=True,
        )],
    ),
    os_profile=compute.OSProfileArgs(
        admin_username="nilfranadmin",
        computer_name=(prefix_name + "-vm"),
        linux_configuration=compute.LinuxConfigurationArgs(
            disable_password_authentication=True,
            ssh=compute.SshConfigurationArgs(
                public_keys=[compute.SshPublicKeyArgs(
                    key_data=ssh_key,
                    path="/home/nilfranadmin/.ssh/authorized_keys",
                )],
            ),
        ),
    ),
    resource_group_name=resource_group.name,
    storage_profile=compute.StorageProfileArgs(
        image_reference=compute.ImageReferenceArgs(
            offer="UbuntuServer",
            publisher="Canonical",
            sku="18.04-LTS",
            version="latest",
        ),
        os_disk=compute.OSDiskArgs(
            caching="ReadWrite",
            create_option="FromImage",
            managed_disk=compute.ManagedDiskParametersArgs(
                storage_account_type="StandardSSD_LRS",
            ),
            name=(prefix_name + "-vm-osdisk"),
        ),
    ),
    vm_name=(prefix_name + "-vm")
)
Creating the stack
Creating the stack is as easy as running:
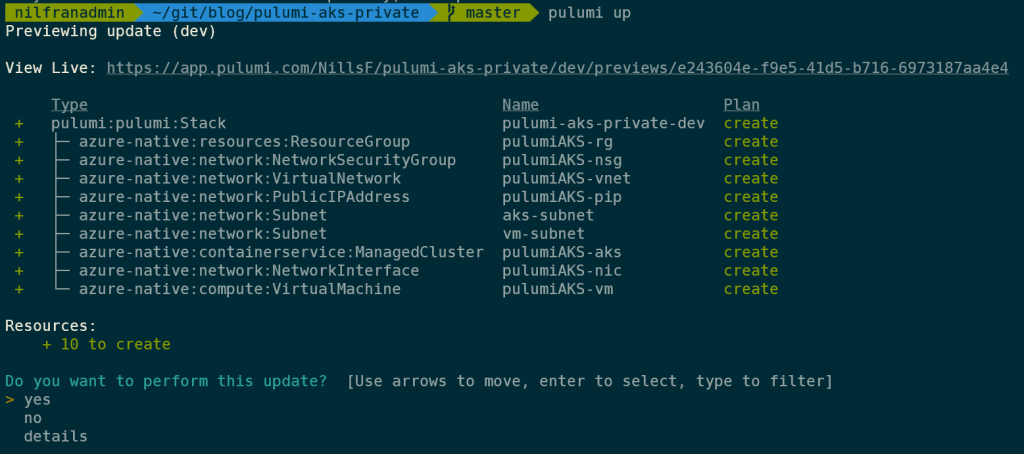
pulumi upWhich will build the plan, ask you if you want to create all the resources, and have you confirm. As with Terraform, Pulumi builds an automatic graph of dependencies, meaning the resource group will be created before the VNET, the NSG will be created before the subnets and so forth. This is the output of the pulumi up command:
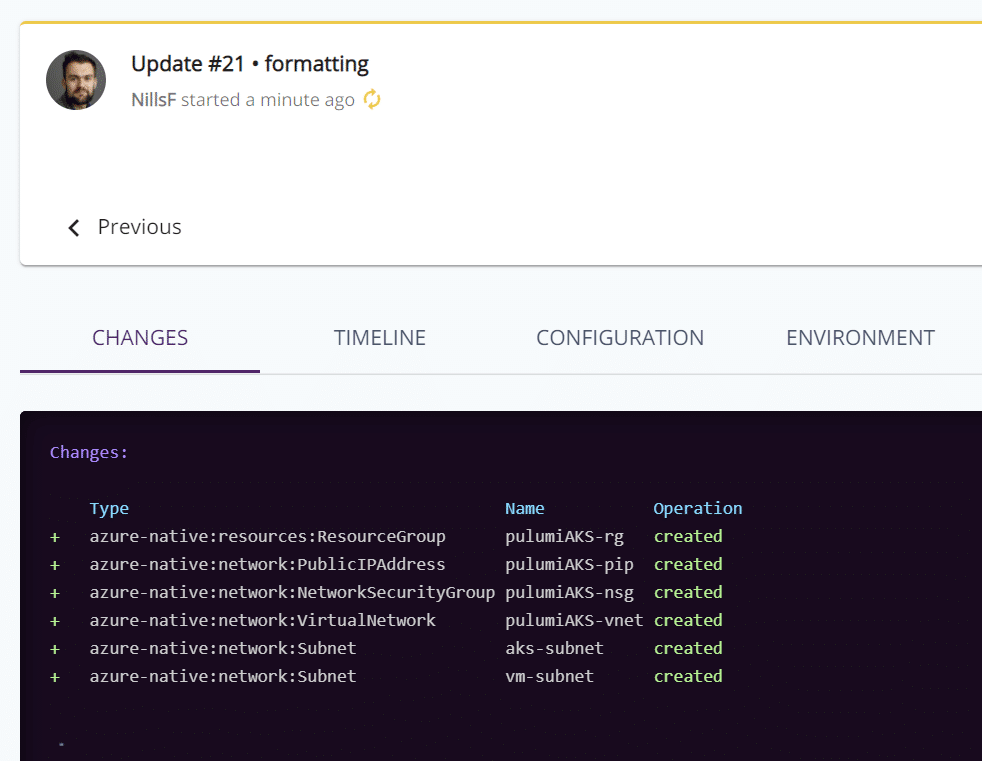
Once this is deploying, you can track the deployment either in the CLI directly, or in the Pulumi web service. The following image shows what’s happening in the Pulumi web service:
The Pulumi web service also maintains a history of your deployments. In my case, you can see how I added resources and made updates to the infrastructure:
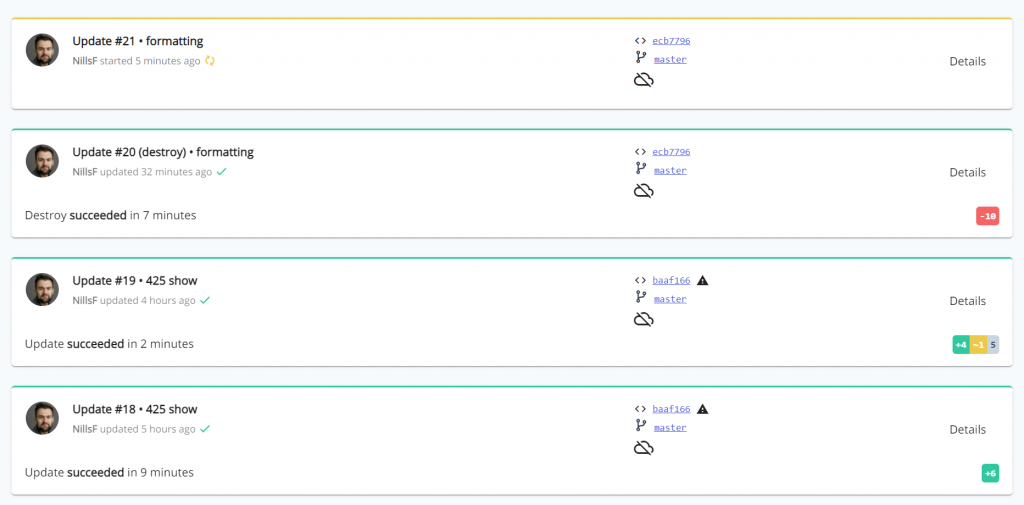
The messages you see next to the update numbers are my git commit messages. Pulumi is actually pretty smart and reads git metadata to learn more about the context of the deployment. As you integrate your infrastructure as code runs with a git repo and a pipeline, I can see this be super useful!
Deploying the entire stack took a little less than 10 minutes to complete. Once complete, I connected to the cluster to prove everything worked fine:
Connecting to the cluster
To prove out everything worked fine, I connected to the VM on its public IP (all created using Pulumi), installed the azure CLI, installed kubectl, logged into azure, got the AKS credentials, and finally connected to the cluster. It all worked well:
curl -sL https://aka.ms/InstallAzureCLIDeb | sudo bash
az login
sudo az aks install-cli
az aks get-credentials -n pulumiAKS-aks34d3b50d -g pulumiAKS-rg
kubectl get nodes
And the final command showed that I could connect to this new cluster:

And this shows that I was able to use Pulumi to create a private AKS cluster, a VM, and was able to connect to the private cluster from that VM.
Summary
In this blog post, I showed you how to create a private AKS cluster and a VM to connect to it using Pulumi. Pulumi is an infrastructure as code tool that leverages general-purpose programming languages to deploy infrastructure.
I shared my thoughts in the introduction of this post. The Pulumi tooling is fantastic. The installation process was flawless, the CLI is beautiful and the web service (although I have some reservations as to why it’s required) has a lot of valuable insights. The one area that slowed me down a bit was finding the right names for all the custom objects required, rather than simple strings in Terraform.