Did you know that if you’re running a service in Kubernetes without additional configuration that you lose the client’s IP address? If you’re answer was ‘no’, you’re in the same boat I was last weekend. Tim Hockin from Google made a nice presentation about connecting into a Kubernetes cluster that opened my eyes to this phenomenon.
You can however solve this issue by setting the service.spec.externalTrafficPolicy field to local in your service definition.
The above is all you need to solve this issue, and in this blog post I’ll show you how to use that field and how that technically works in the Azure Kubernetes Service.
Demo app
For the purpose of this blog post, I created a small demo app in Node.js. The purpose of this app, is to display the client’s IP connecting to the service in a web page. The node app is very simple:
var http = require('http');

//create a server object:
http.createServer(function (req, res) {
  res.write(req.connection.remoteAddress); //write a response to the client
  res.end(); //end the response
}).listen(8080); //the server object listens on port 8080
I put this app in a Docker container that is published on the Dockerhub (this is actually my first public container image on the Dockerhub 🎉). You can deploy this app for yourself if you want to follow along in this demo using the following Kubernetes deployment file (which will deploy the app and a service).
apiVersion: apps/v1
kind: Deployment
metadata:
  name: node-deployment
  labels:
    app: node
spec:
  replicas: 1
  selector:
    matchLabels:
      app: node
  template:
    metadata:
      labels:
        app: node
    spec:
      containers:
      - name: node
        image: nfranssens/nodejs-ip
        ports:
        - containerPort: 8080
---
apiVersion: v1
kind: Service
metadata:
  name: node-service
spec:
  selector:
    app: node
  ports:
    - protocol: TCP
      port: 80
      targetPort: 8080
  type: LoadBalancer
You can deploy this app using kubectl create -f deploy.yaml. Give it a couple seconds, and then get the service’s public IP using kubectl get svc node-service.
Default service behavior in AKS
If you deployed this app using the YAML above and got the public IP address, you should see something similar to the screenshot below in your browser:

This is the IPv6 representation of a private IPv4 address. This is however not the client’s public IP. This is to be expected using Kubernetes, since Kubernetes by default configures networking to allow traffic for a service on all the nodes, even if those nodes don’t have pods running that service. This has the side-effect that SNAT is required to ensure that the pod receiving the traffic has a path out without causing asymmetric routing. For more details on this behavior, I highly recommend checking out Tim Hockin’s presentation I mentioned in the introduction.
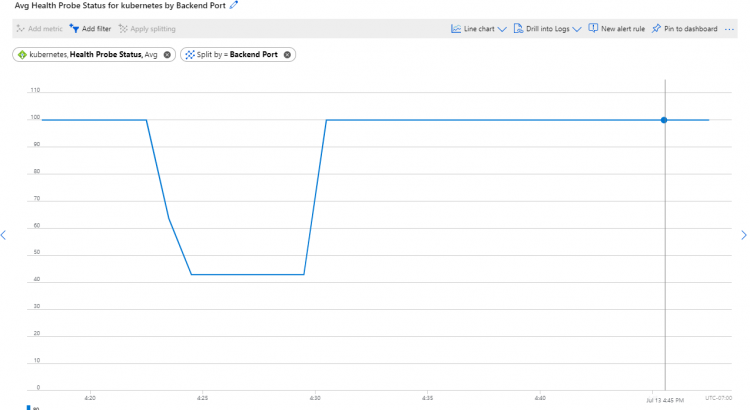
I wanted to investigate this a bit deeper in AKS. To see how this works, we could have a look at the health probe status of the health probe of this service. The health probe on an Azure Load Balancer controls which backend nodes can receive traffic for that service. Since in this deployment there is only a single pod but we have multiple nodes, to make sense of this, the health probe status should be at 100% now:
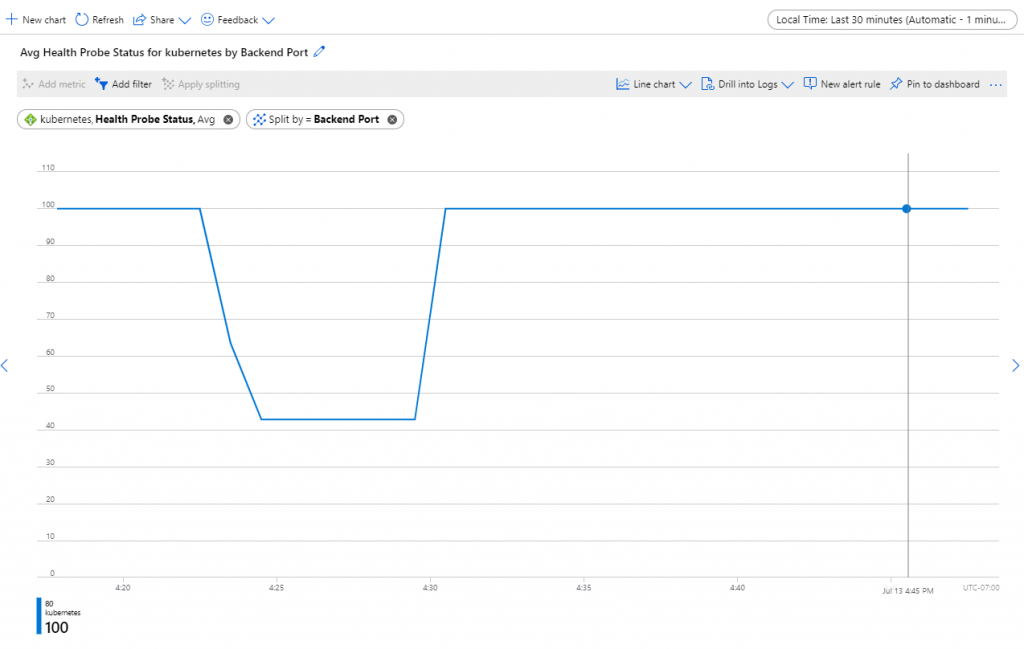
And, as you can see, in my case, the health probe status is now at 100% (don’t mind the drop earlier, this was me doing some other testing). If you want to get the same view yourself, follow the following steps:
- In the Azure portal, go to resource groups.
- Look for the resource group hosting your AKS cluster. By default this has the name of mc_*AKS RG name*_*AKS name*_*location*.
- In that resource group, open the load balancer called kubernetes.
- On the left hand side navigation, select Metrics.
- As metric select “Health Probe Status”, and click the “Apply splitting” button.
- Set the visibility (top right hand corner) to 30 minutes with a granularity of 1 minute.
Let’s now change this behavior to have the service maintain our client’s IP address.
Maintaining client’s IP address
In order to maintain the client’s (public) IP address, we’d need to set the service.spec.externalTrafficPolicy field to local in our service definition. You can check out how to do this here, and apply this update using kubectl apply -f deploy_clientIP.yaml. If you now browse to the service’s public IP, you should see your own public IP:

Given my understanding of how the Azure load balancer sends traffic to backend nodes, I was expecting the health probe status of the load balancer to drop down to 50% in this case (only 1 our of 2 nodes hosting the pod that services this traffic). And this was the case indeed:
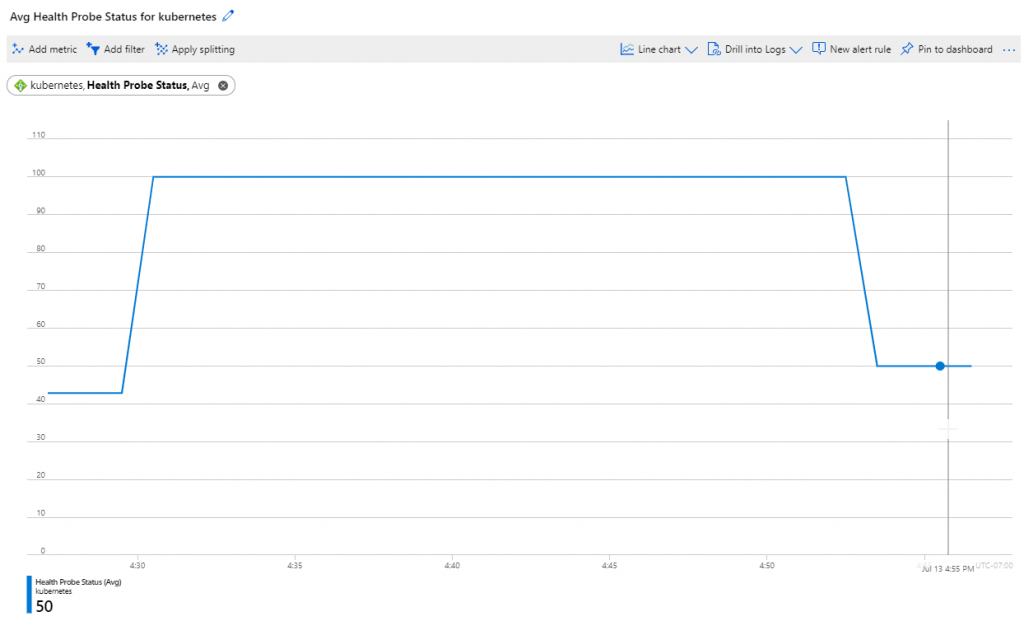
And that’s how you maintain a client’s IP when connecting to a service in Kubernetes.
Summary
In this post we looked into how to maintain a client’s public IP when connecting to a Kubernetes service. We first deployed a service using the default service implementation, which didn’t maintain the public IP. We then changed the service.spec.externalTrafficPolicy field to local in our service definition and saw how we were able to maintain a client’s source IP address. During the post, we looked briefly into how Azure handles this with the load balancer health probes.